So, let’s get into it. The Azure Pricing Calculator is quite extensive, but once you know where to start, it’s fairly straightforward.
Here’s a step-by-step guide to help you get the most out of it:
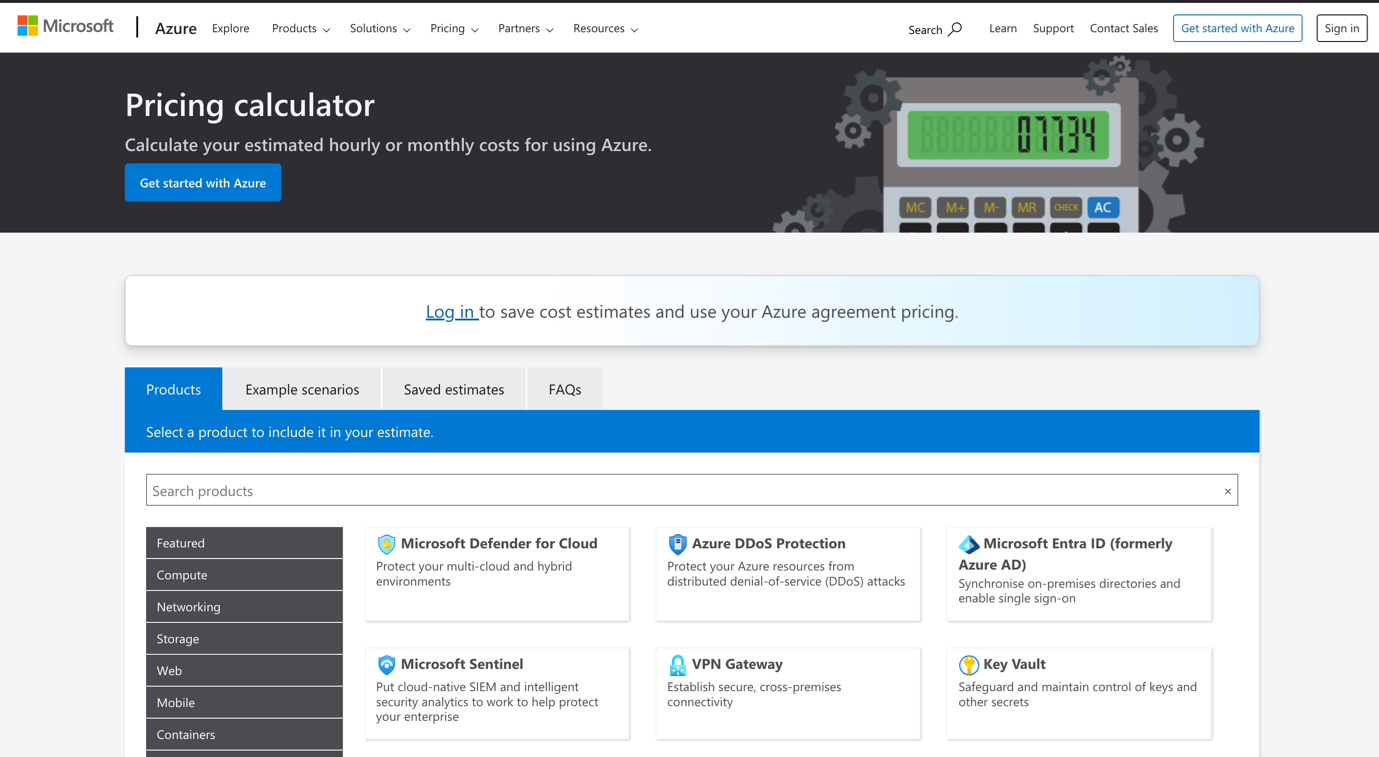
Step 1: Access the Azure Pricing Calculator
Head over to the Azure Pricing Calculator main page. If you’re logged in to your Azure account, you’ll be able to save your cost estimates as you go and make use of any pricing arrangements in your Azure agreement.
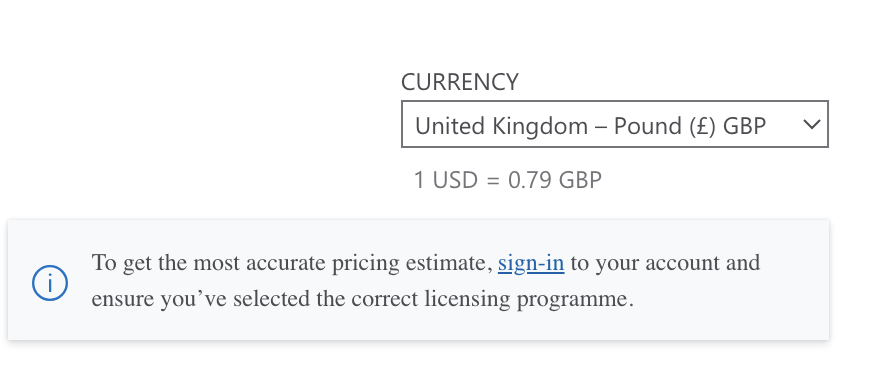
Step 2: Select your currency
The calculator tends to default to US dollars. If you’re like us and prefer using pounds, head to the bottom of the page first, and on the right-hand side you’ll see an option to change it.
Step 3: Choose your services

Now it’s time to select your services by using the menu on the left.
There’s a huge range of services you can choose from (the entire Azure offering is massive). In ‘featured’ you’ll find some of the most common, like VMs, storage and SQL databases.
Underneath this, you’ve got the full range including compute, networking, load balancers, automation, machine learning, AI, IoT, DevOps, and more.
Add as many as you like to your selection.
Step 4: Consider using an example scenario
Don’t want to manually create your full configuration? You can take the easy route instead and select a pre-configured example setup.
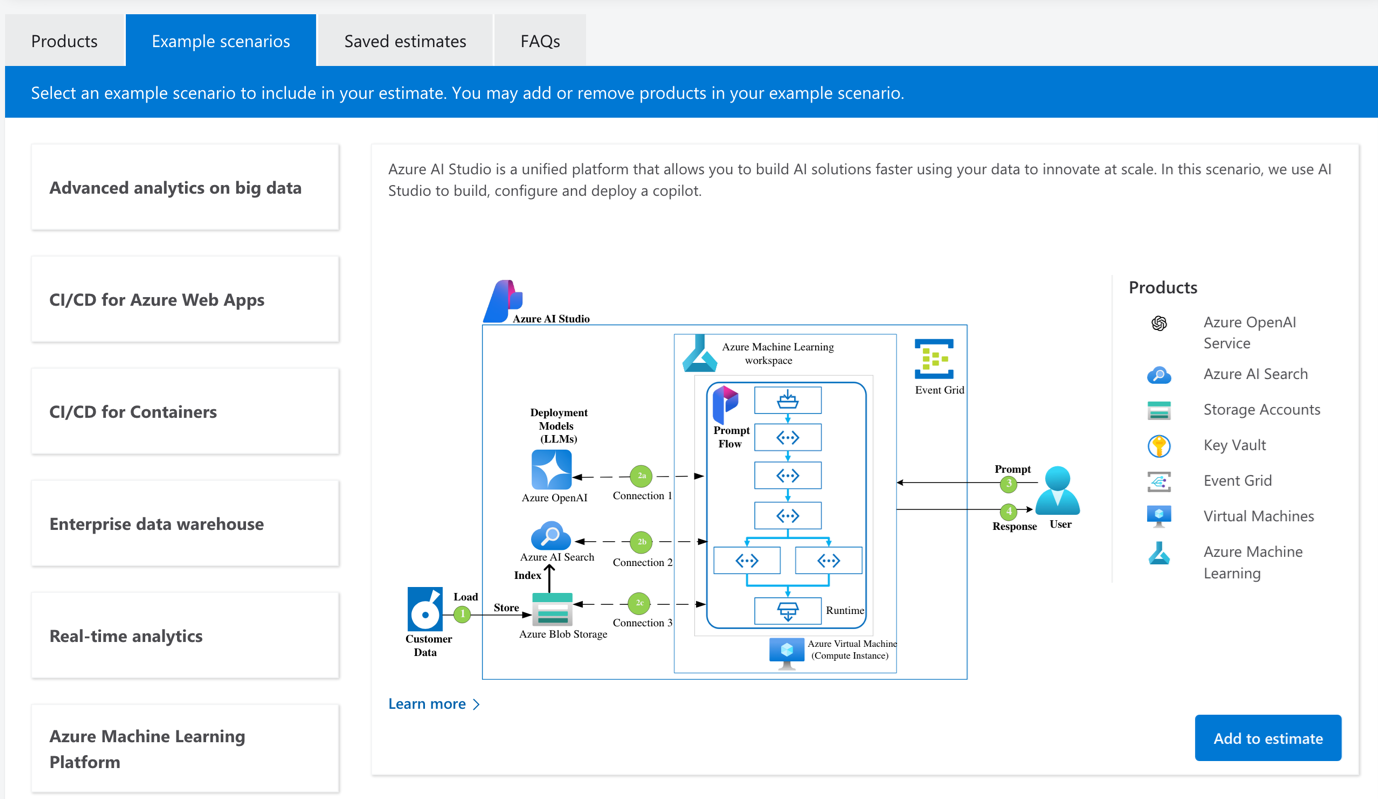
In this tab, you can select a full setup of Azure AI Studio, for example, and it’ll populate your basket with all the necessary components that’d require. Here are the components it adds for Azure AI Studio on a 1-month reserved option:
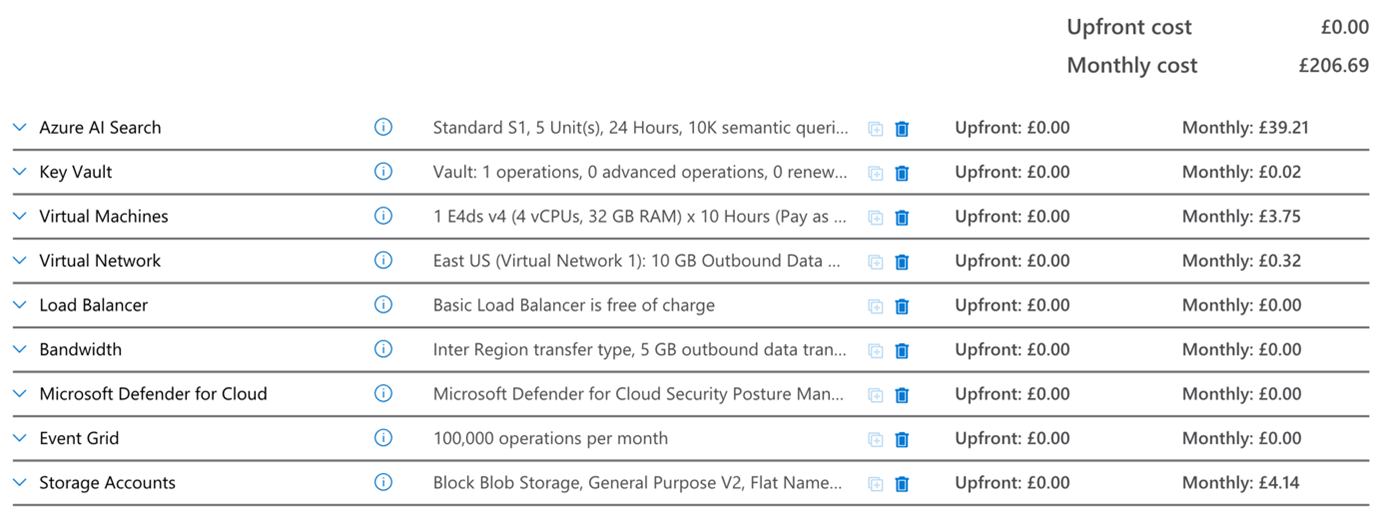
You can click the arrow on the left to expand each option and customise its individual options.
Step 5: Add usage details
Now you’ll want to go into each service and estimate your usage.
For example, here we’re looking at Azure virtual machines:

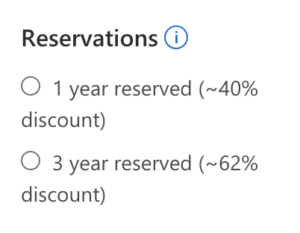
Imagine we’ll be using a single VM for a simple web app. We’ve selected the region (UK South), and instance (the specs of the VM – in this case, a general-purpose low-spec B2s with 2-core CPU.)
(Tip: if you happen to be choosing a virtual machine, and you’re overwhelmed by the options which are many, try using Copilot, located on the top right of the Azure Portal. You can tell the AI assistant what you need, and it’ll recommend the best options. Or you can select the “help me choose the right VM size for my workload” button near the top of the pane).
We’ve also defined our estimated hours per month of usage to help calculate the cost.
If you’re pricing up other services, you’ll have to enter specific data about each one (like size and speed for storage, bandwidth for networking, or license counts for Azure DevOps).
If you’re not sure what numbers to enter, start with your current on-premises or cloud workload data as a baseline. If you don’t have those, just stick with the default data.
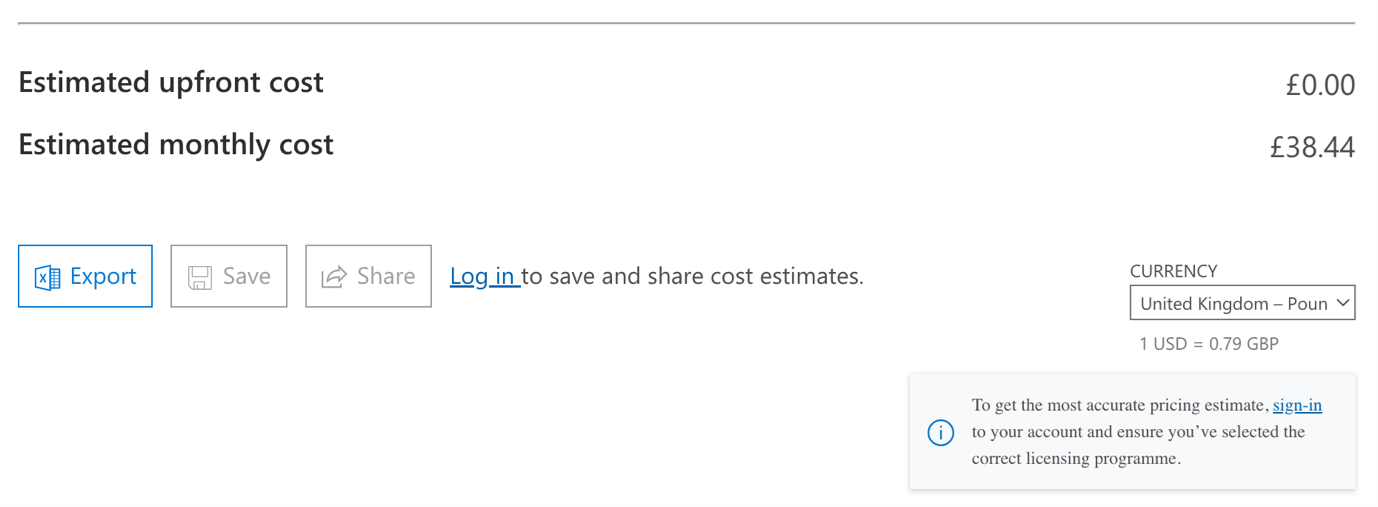
Step 6: Save and export your options
Now we’ve entered enough data to calculate some totals.
At the bottom of the page, you’ll now see your totals: an estimated upfront cost and an estimated monthly cost.
You can click ‘save’ if you’re logged in, if you want to come back to your configuration. And if you click ‘export’, you can get everything put together in an Excel spreadsheet.
Remember, you can customise multiple ‘baskets’ at a time to see different pricing configurations. They’re arranged in tabs in the middle of the page: