Putting Azure Site Recovery Failover to the Test

Matt Dyson, Microsoft Azure Consultant at Synextra
Article by:
Matt Dyson
Microsoft Azure Consultant
Azure site recovery failovers

It’s happening. The world’s falling apart. Global outages. Data centres impacted.

You’ve done the prep but if your VMs go down, none of it matters.

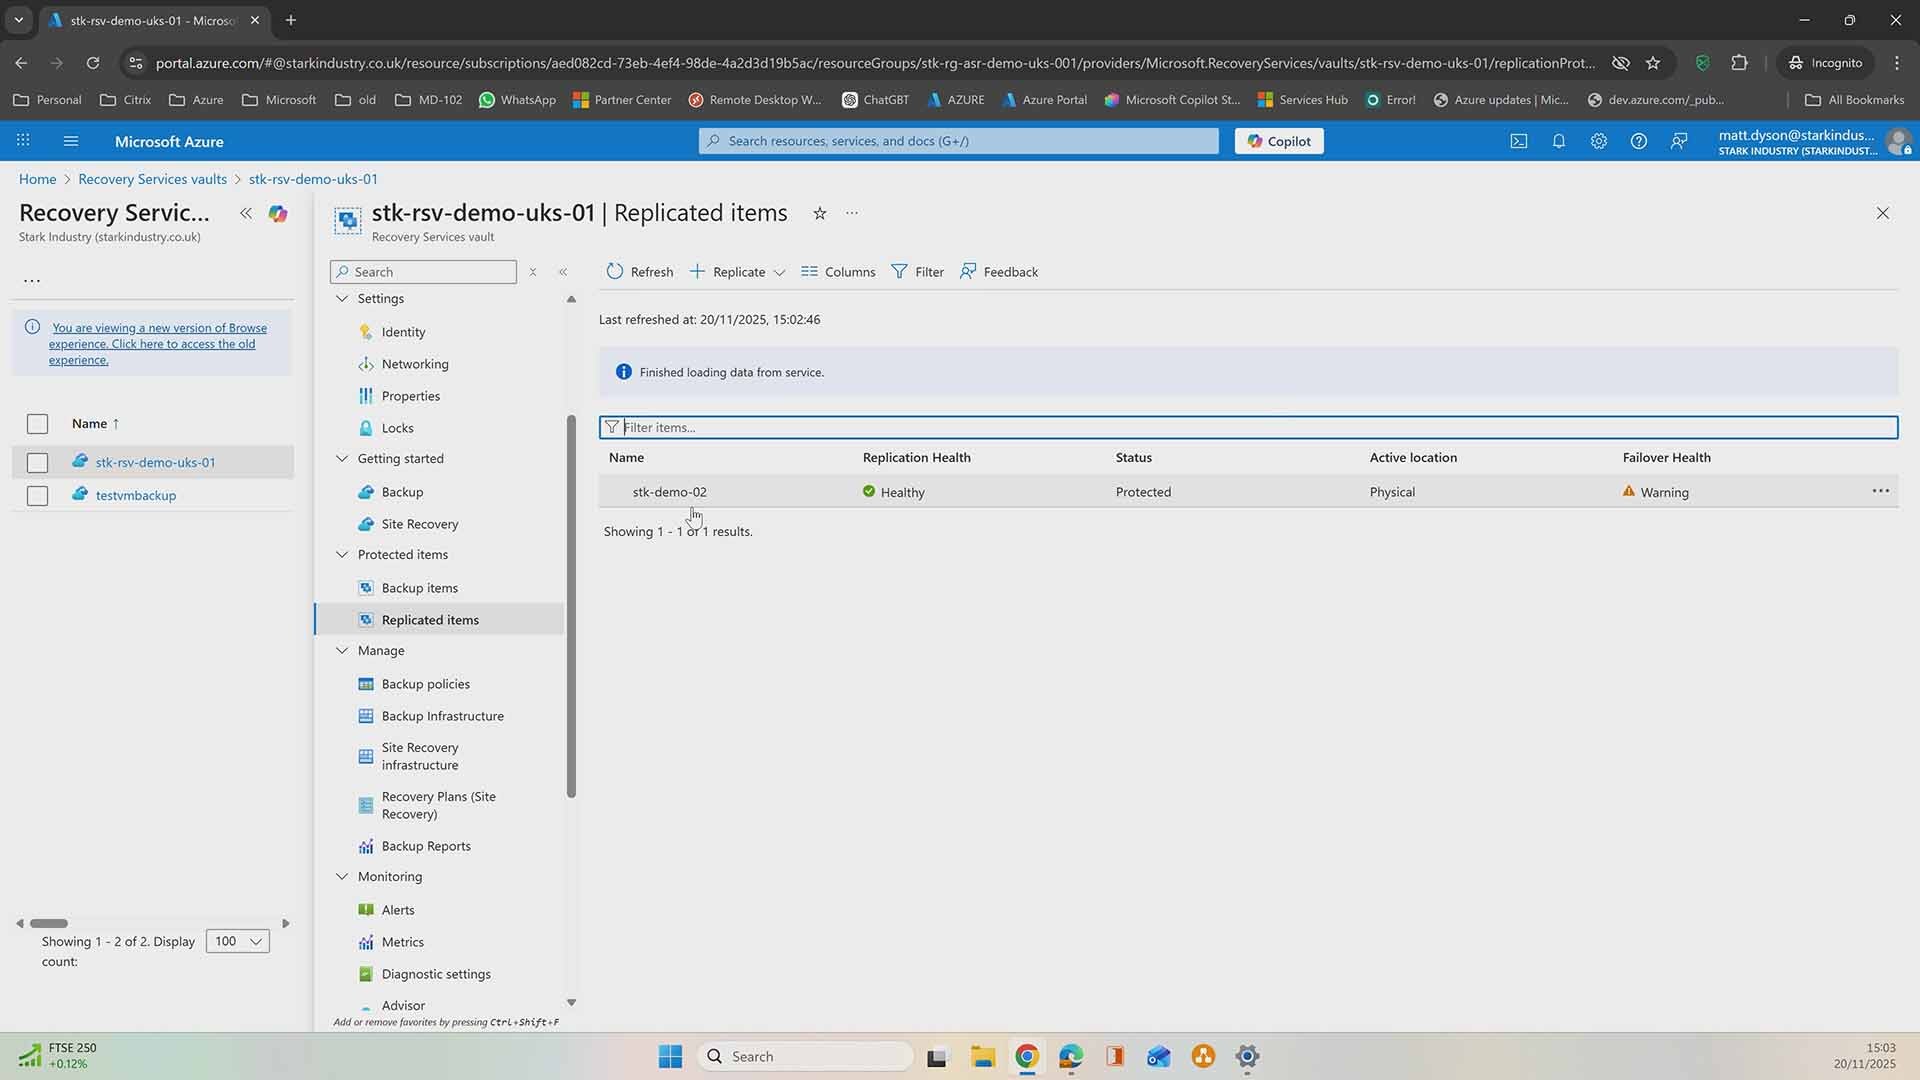
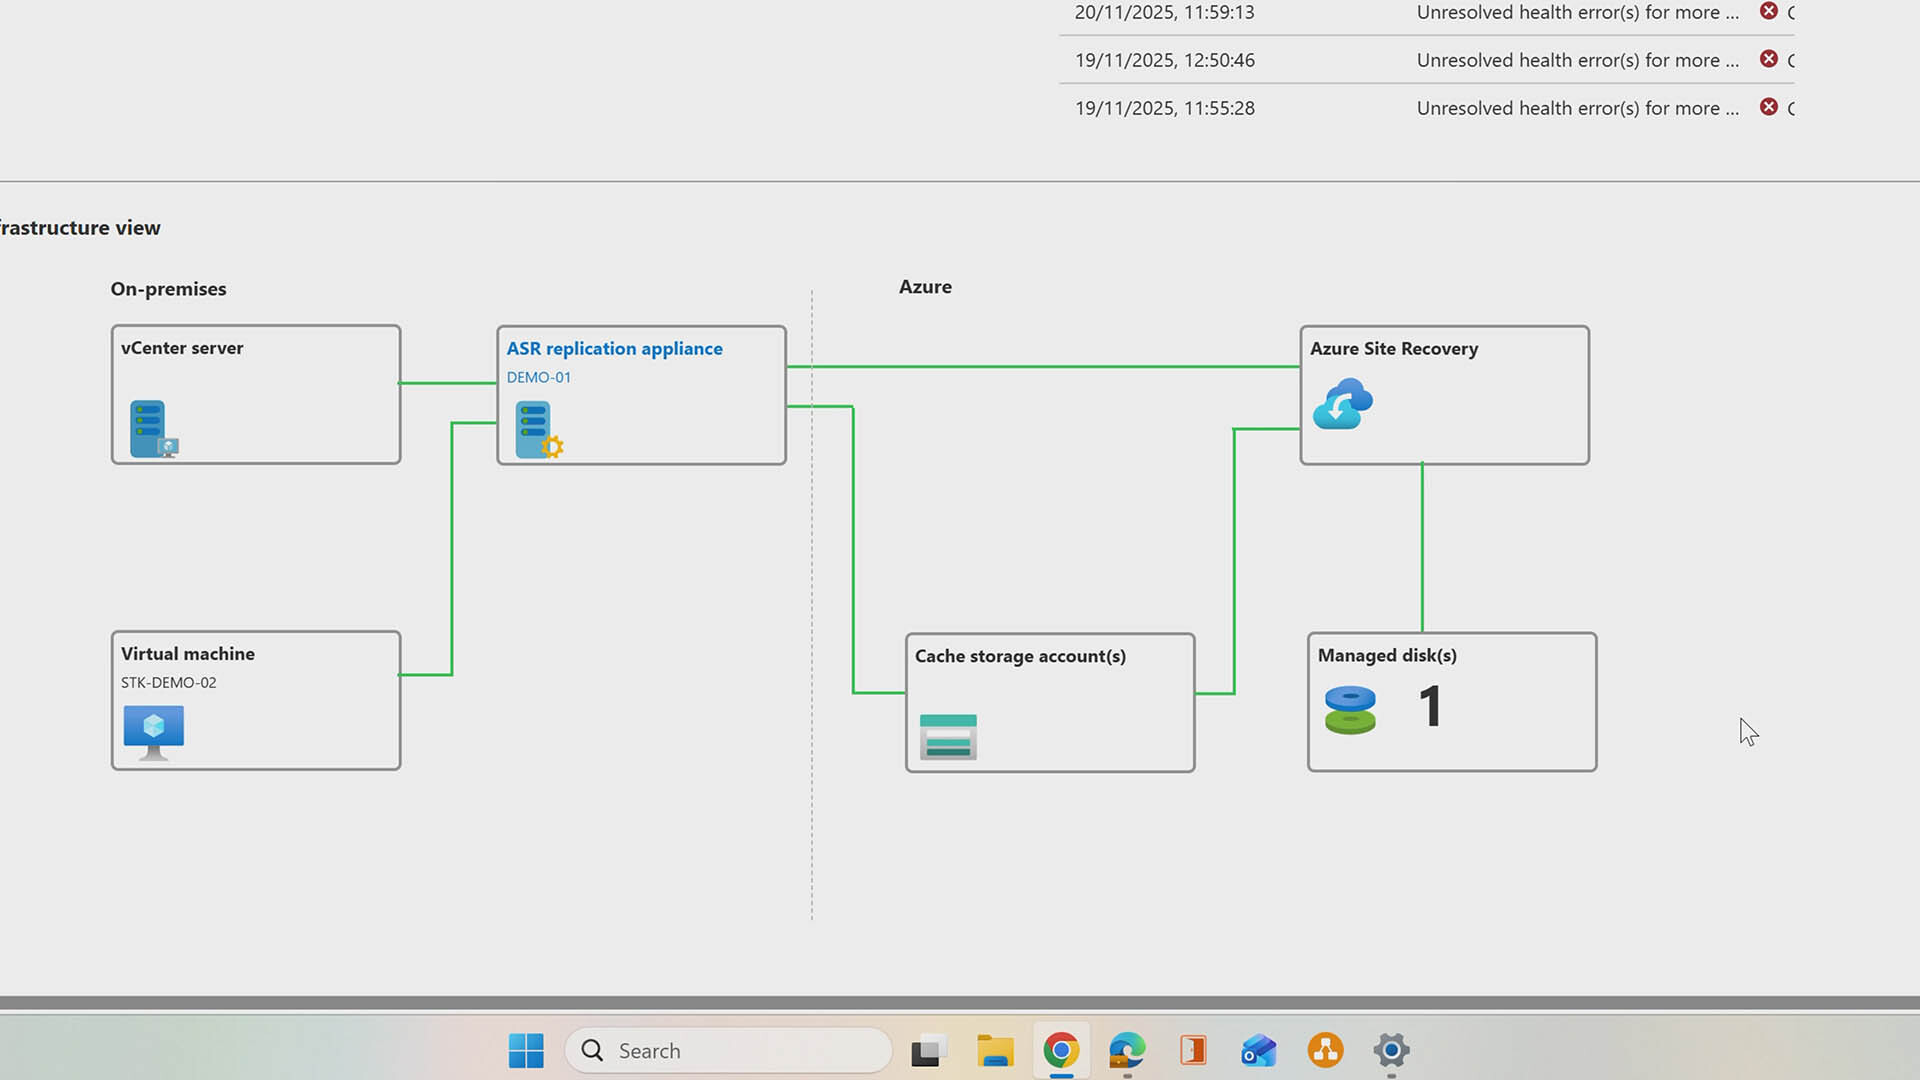
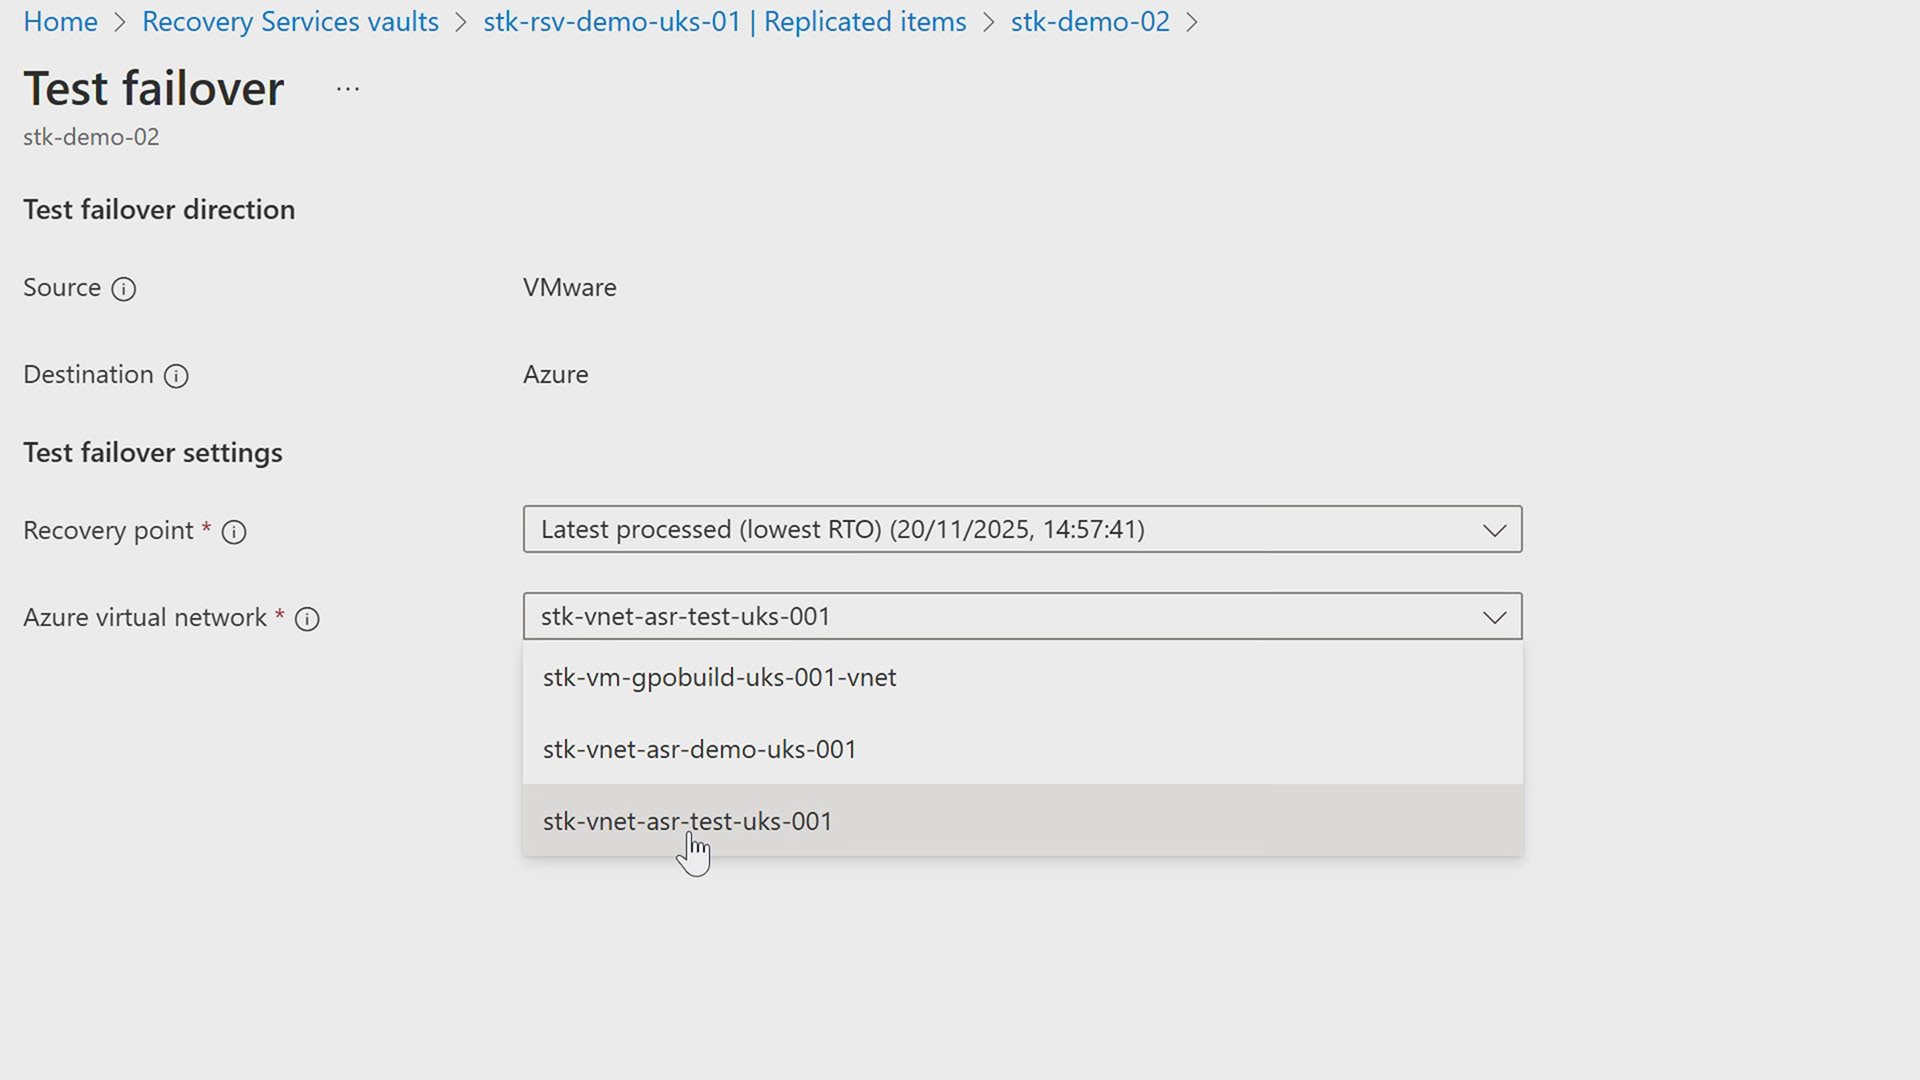
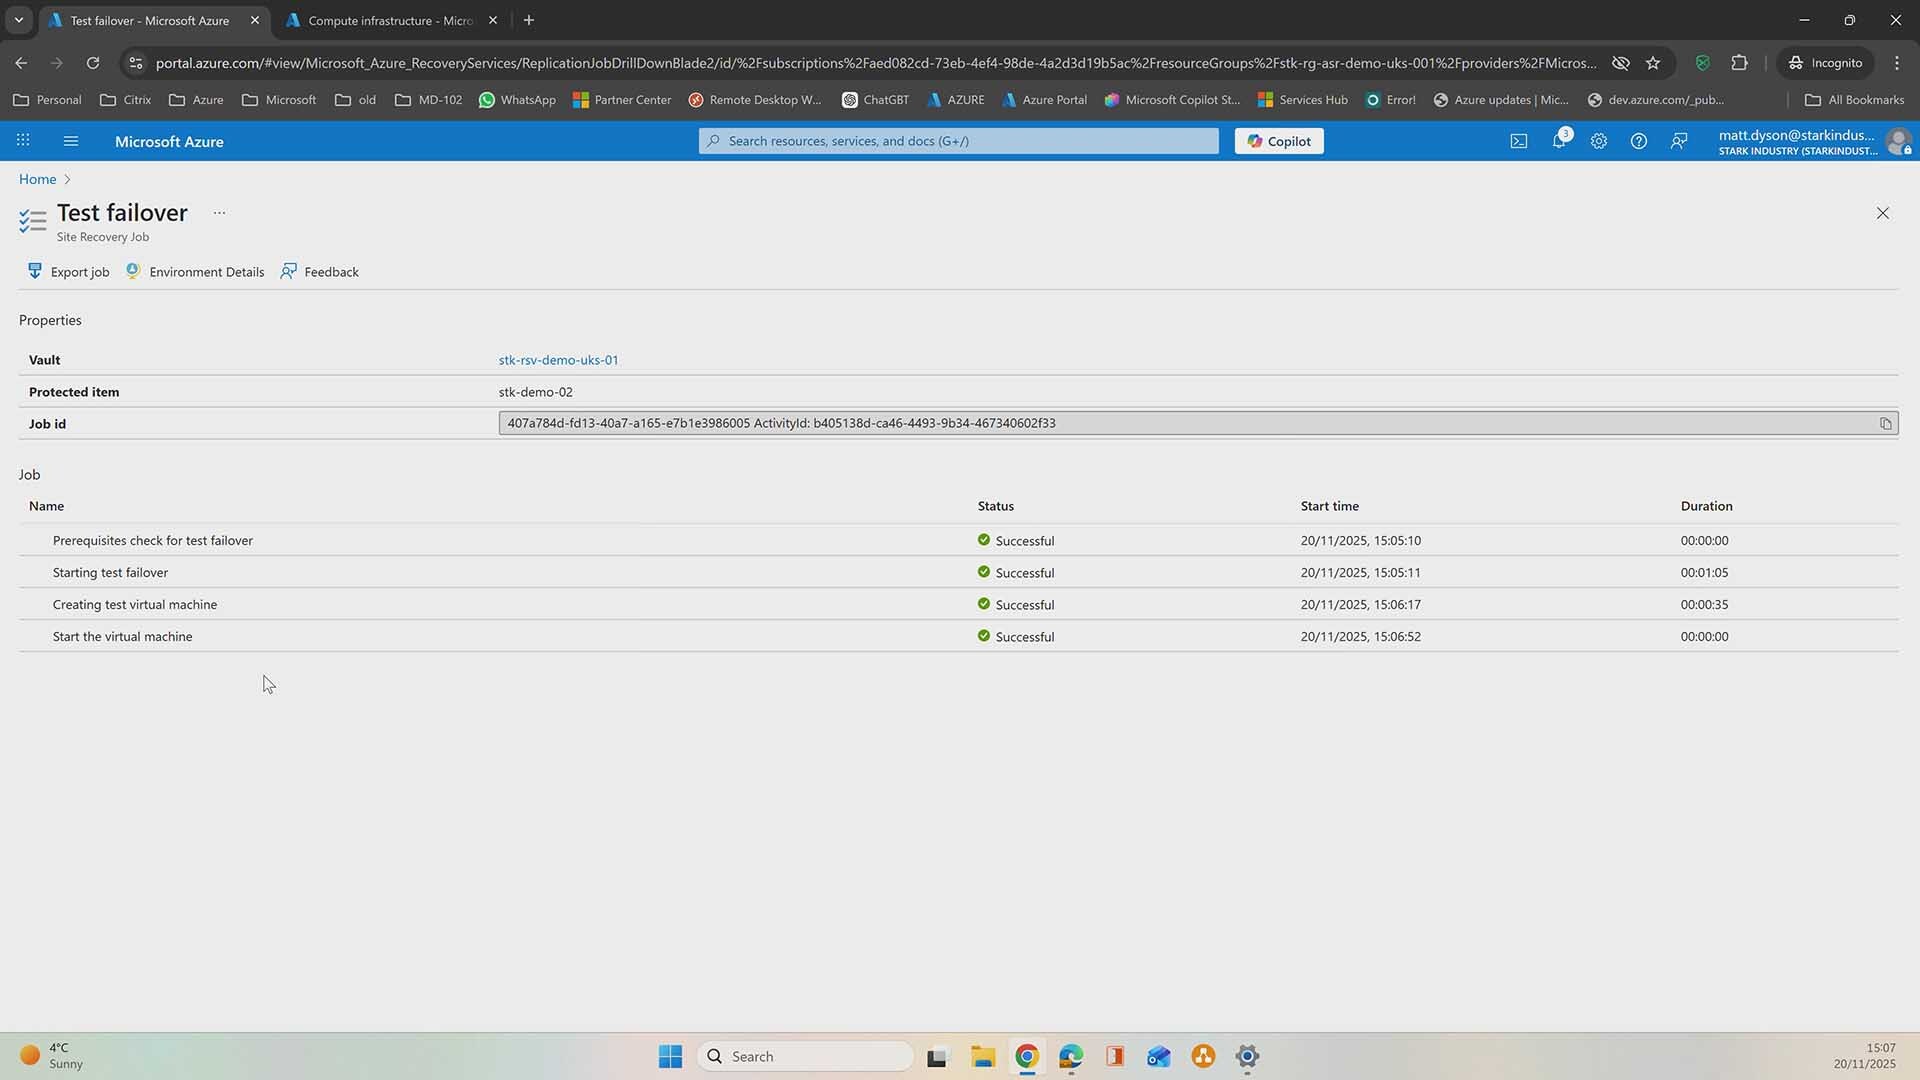
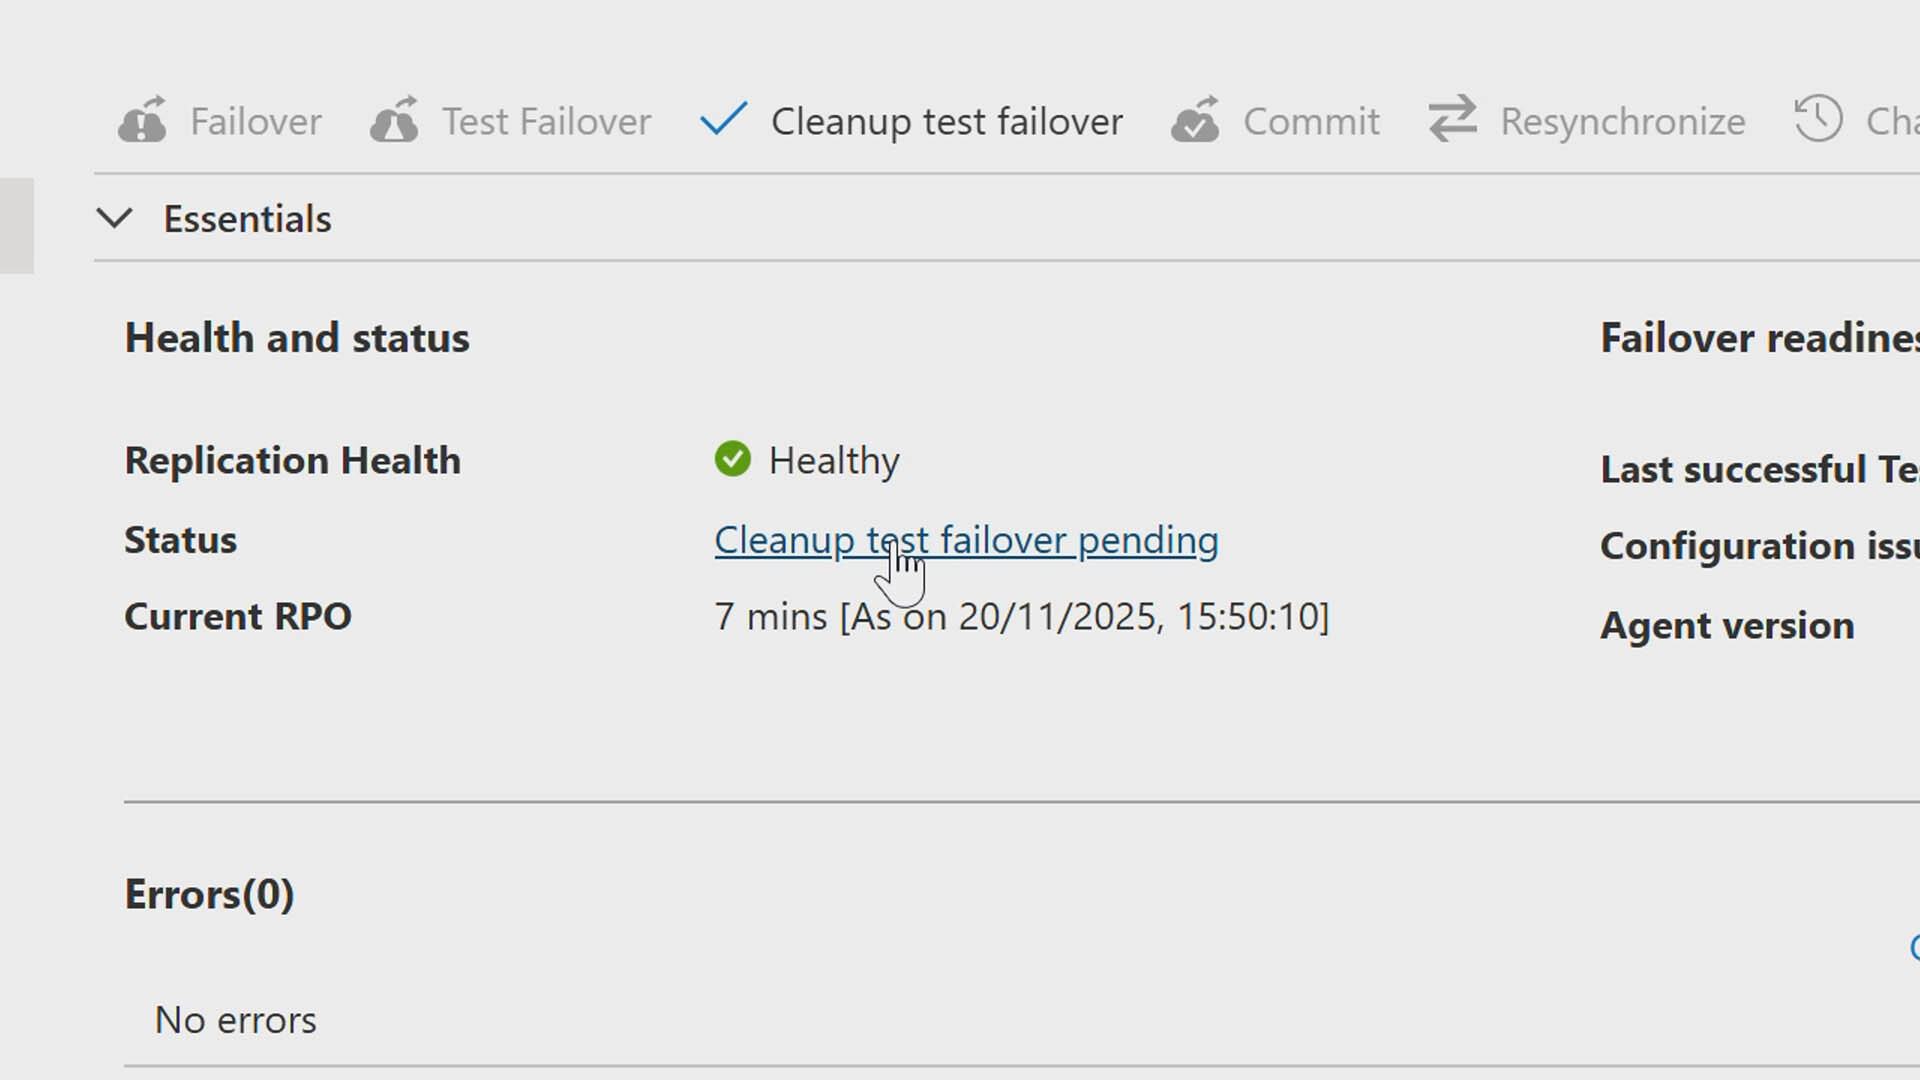
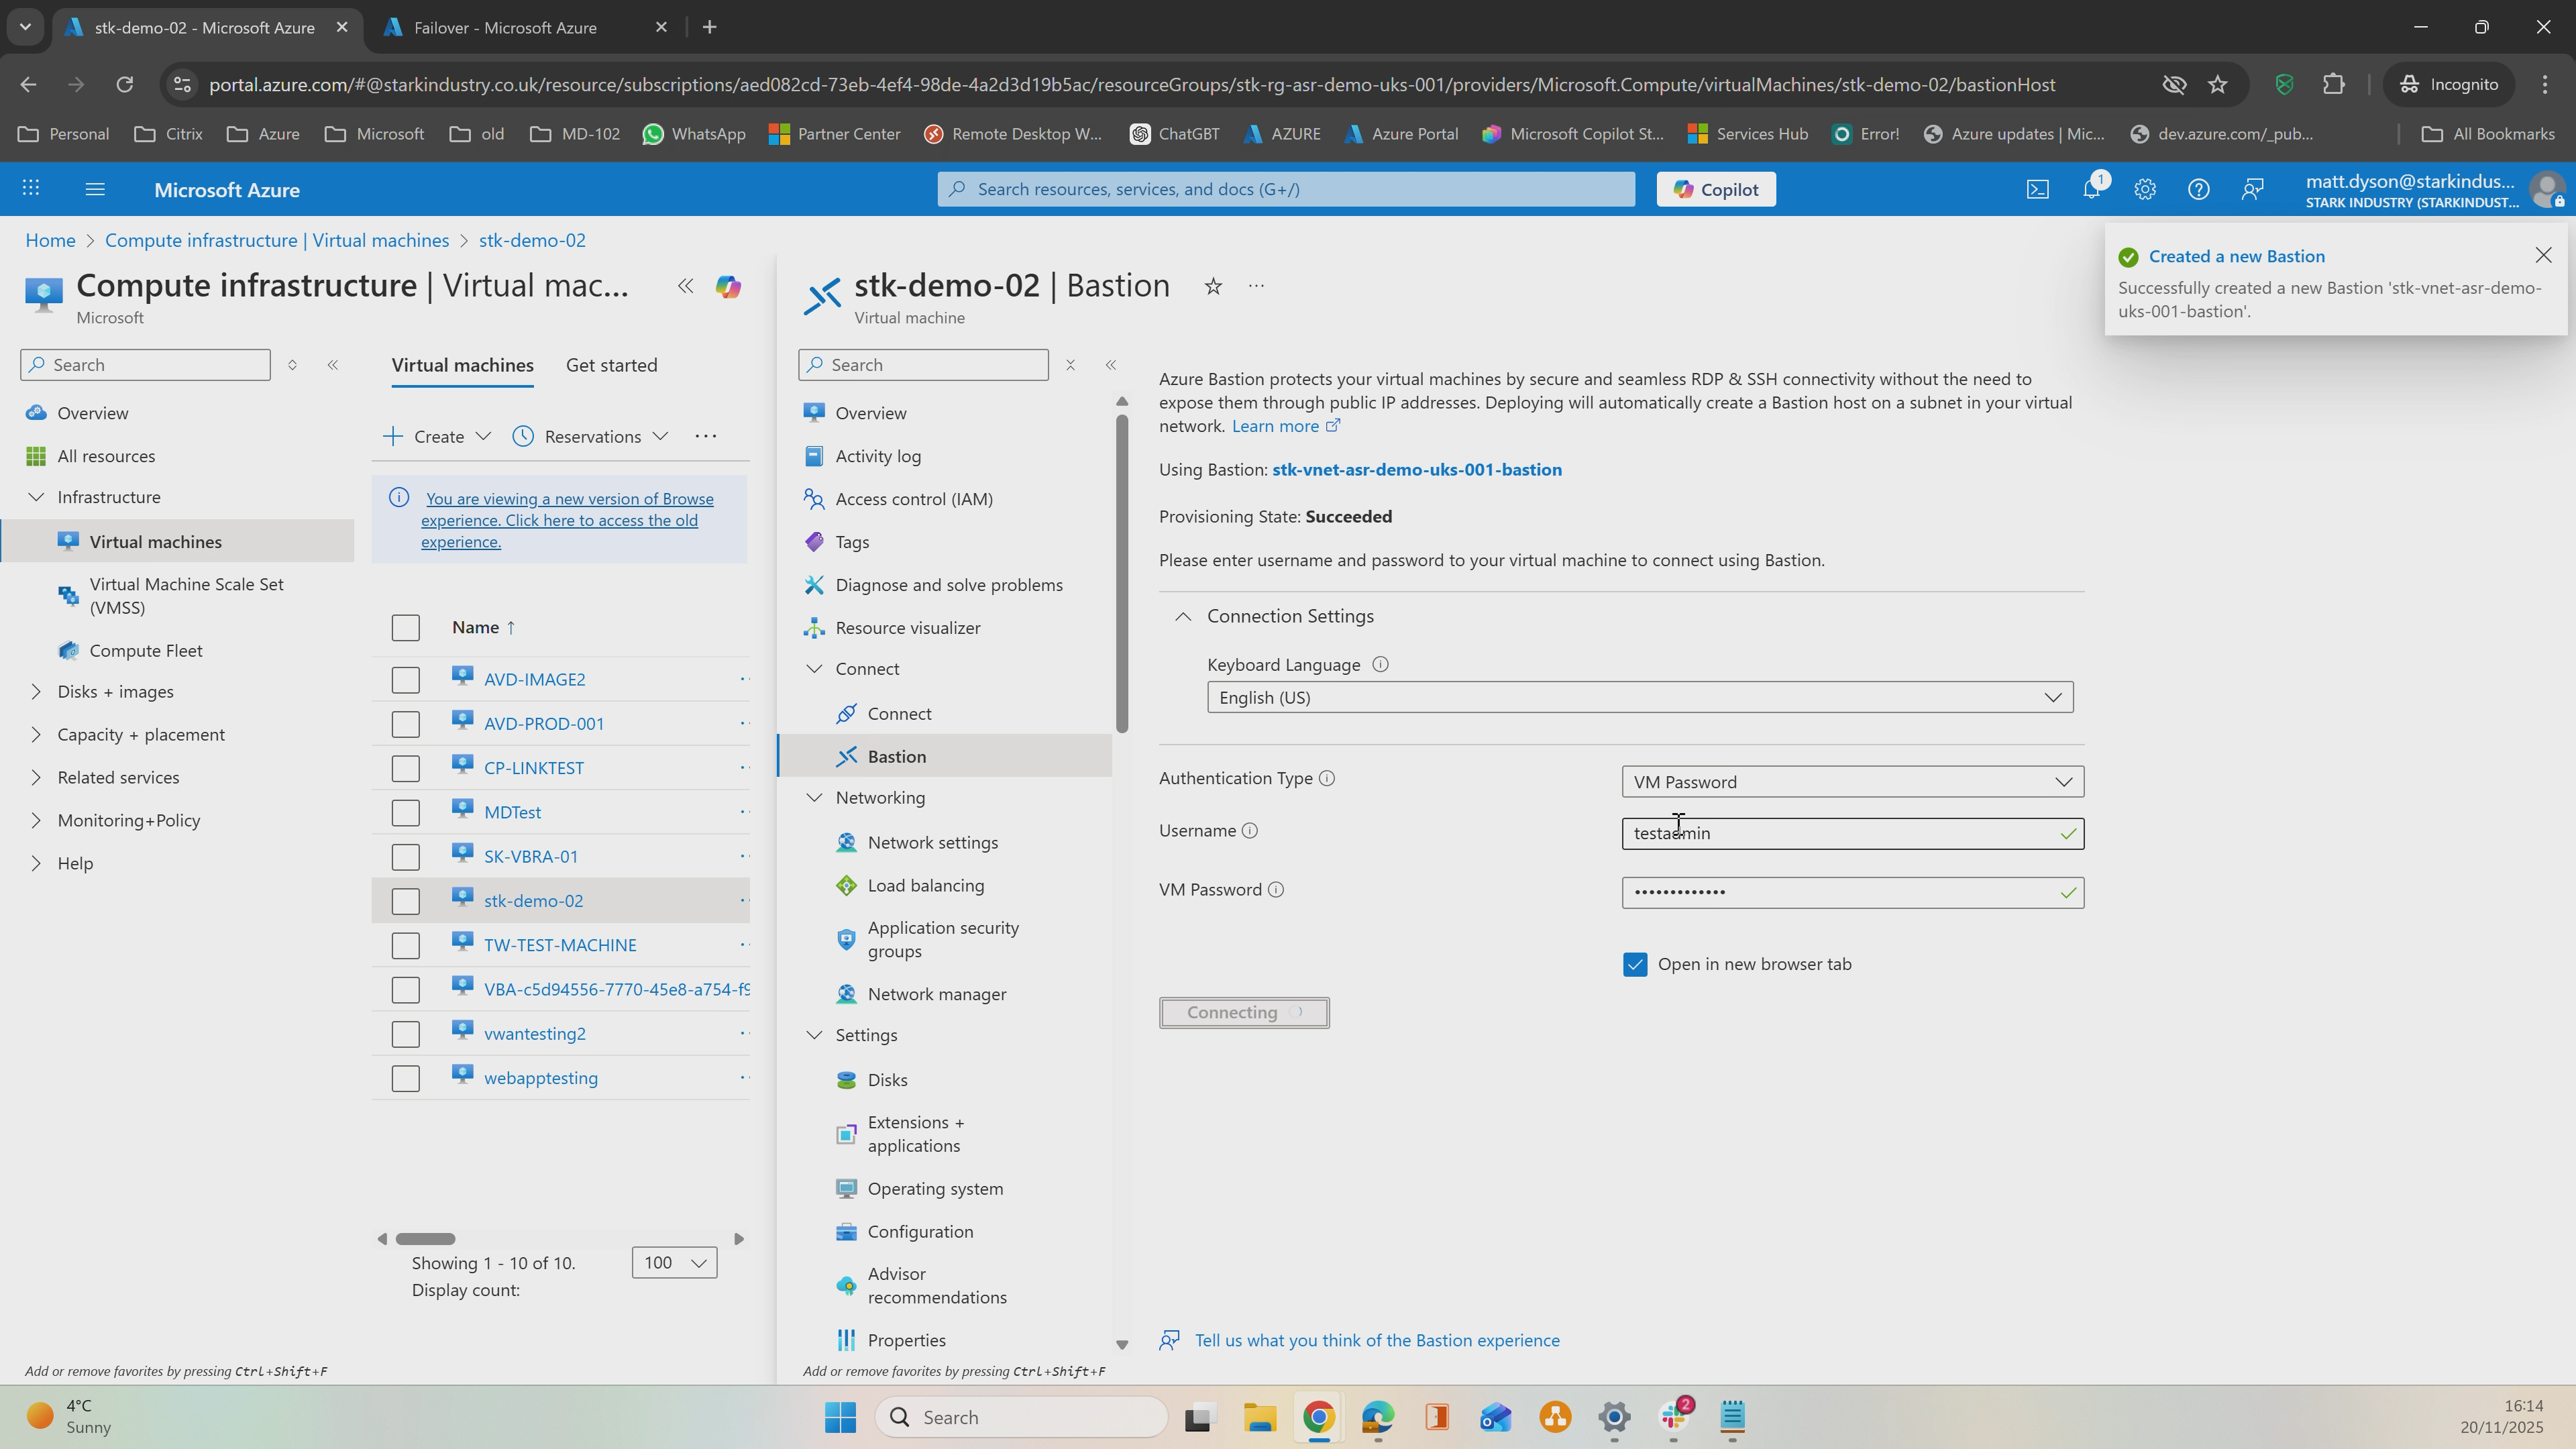
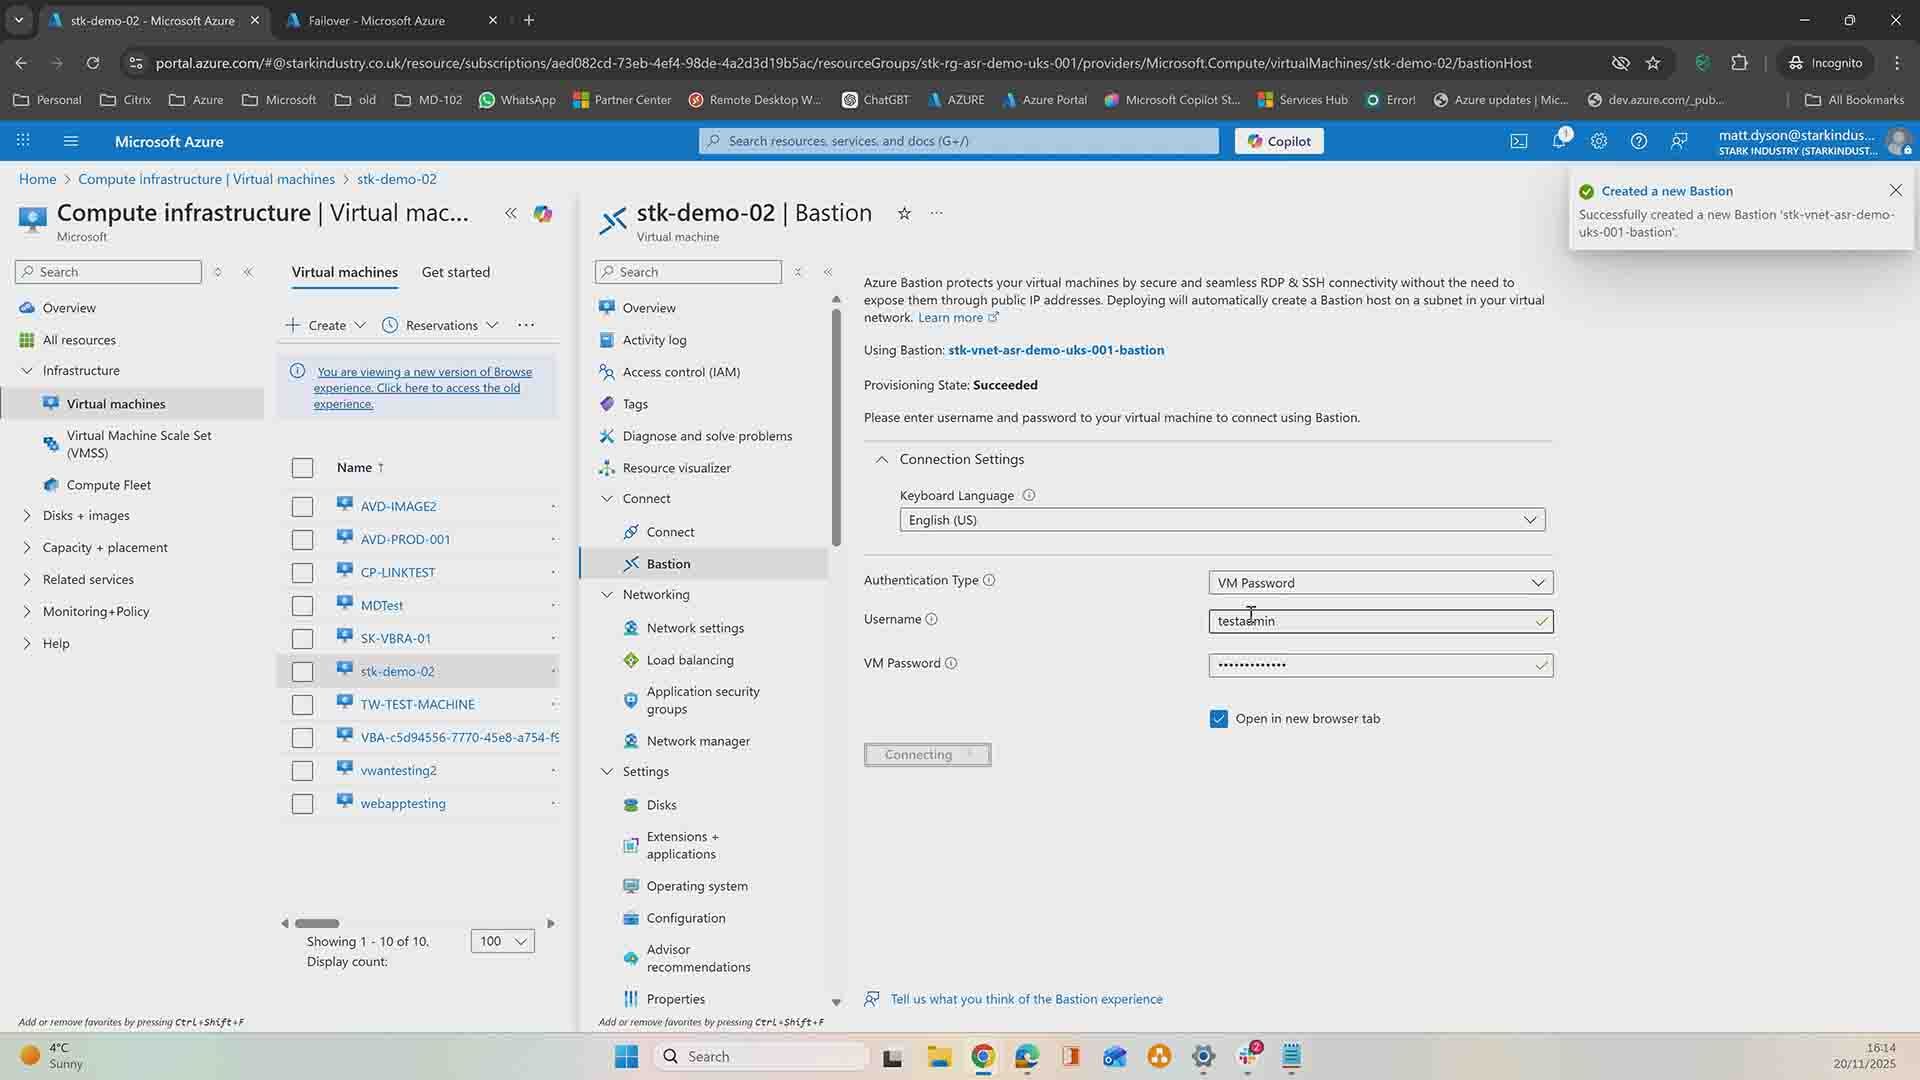
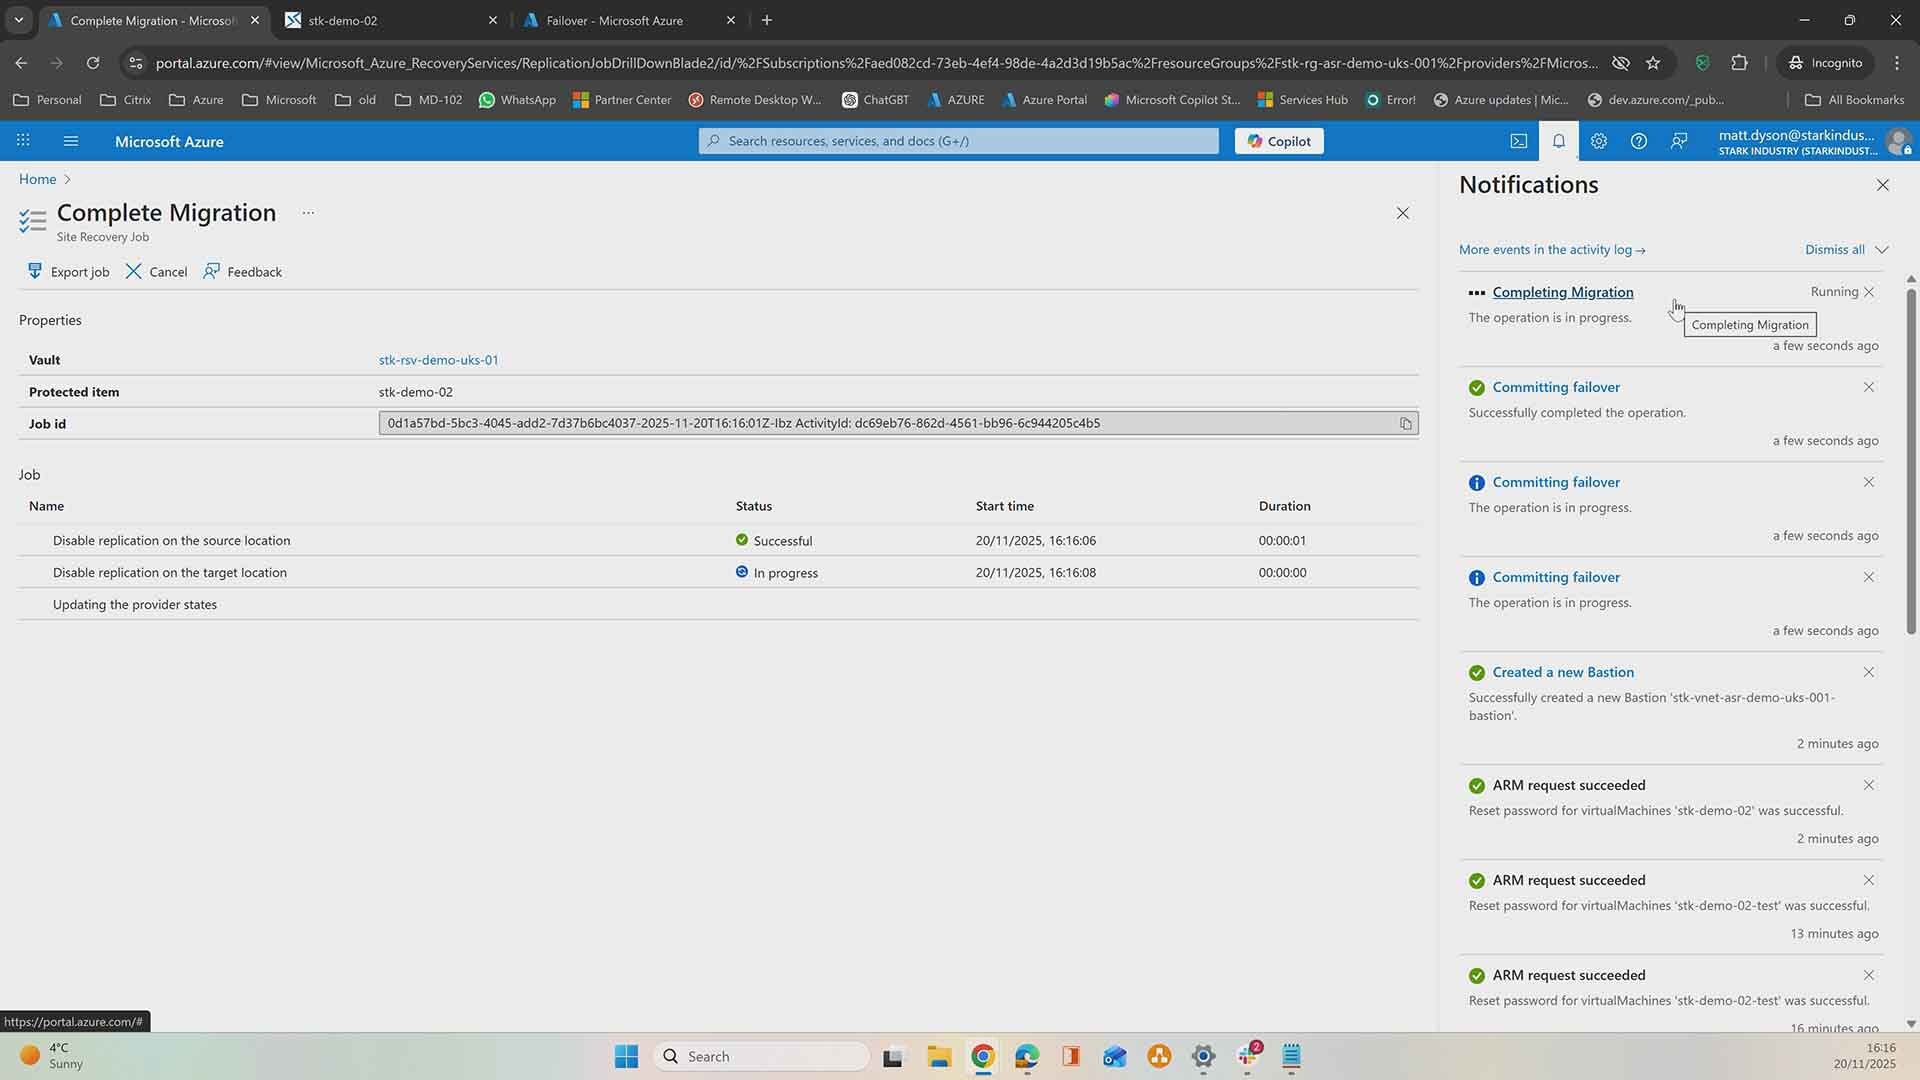
This is part two of our Azure Site Recovery series, where we move beyond configuration and into the moment that really counts: failover. If you missed part one on setting up Azure Site Recovery, it’s worth watching first.

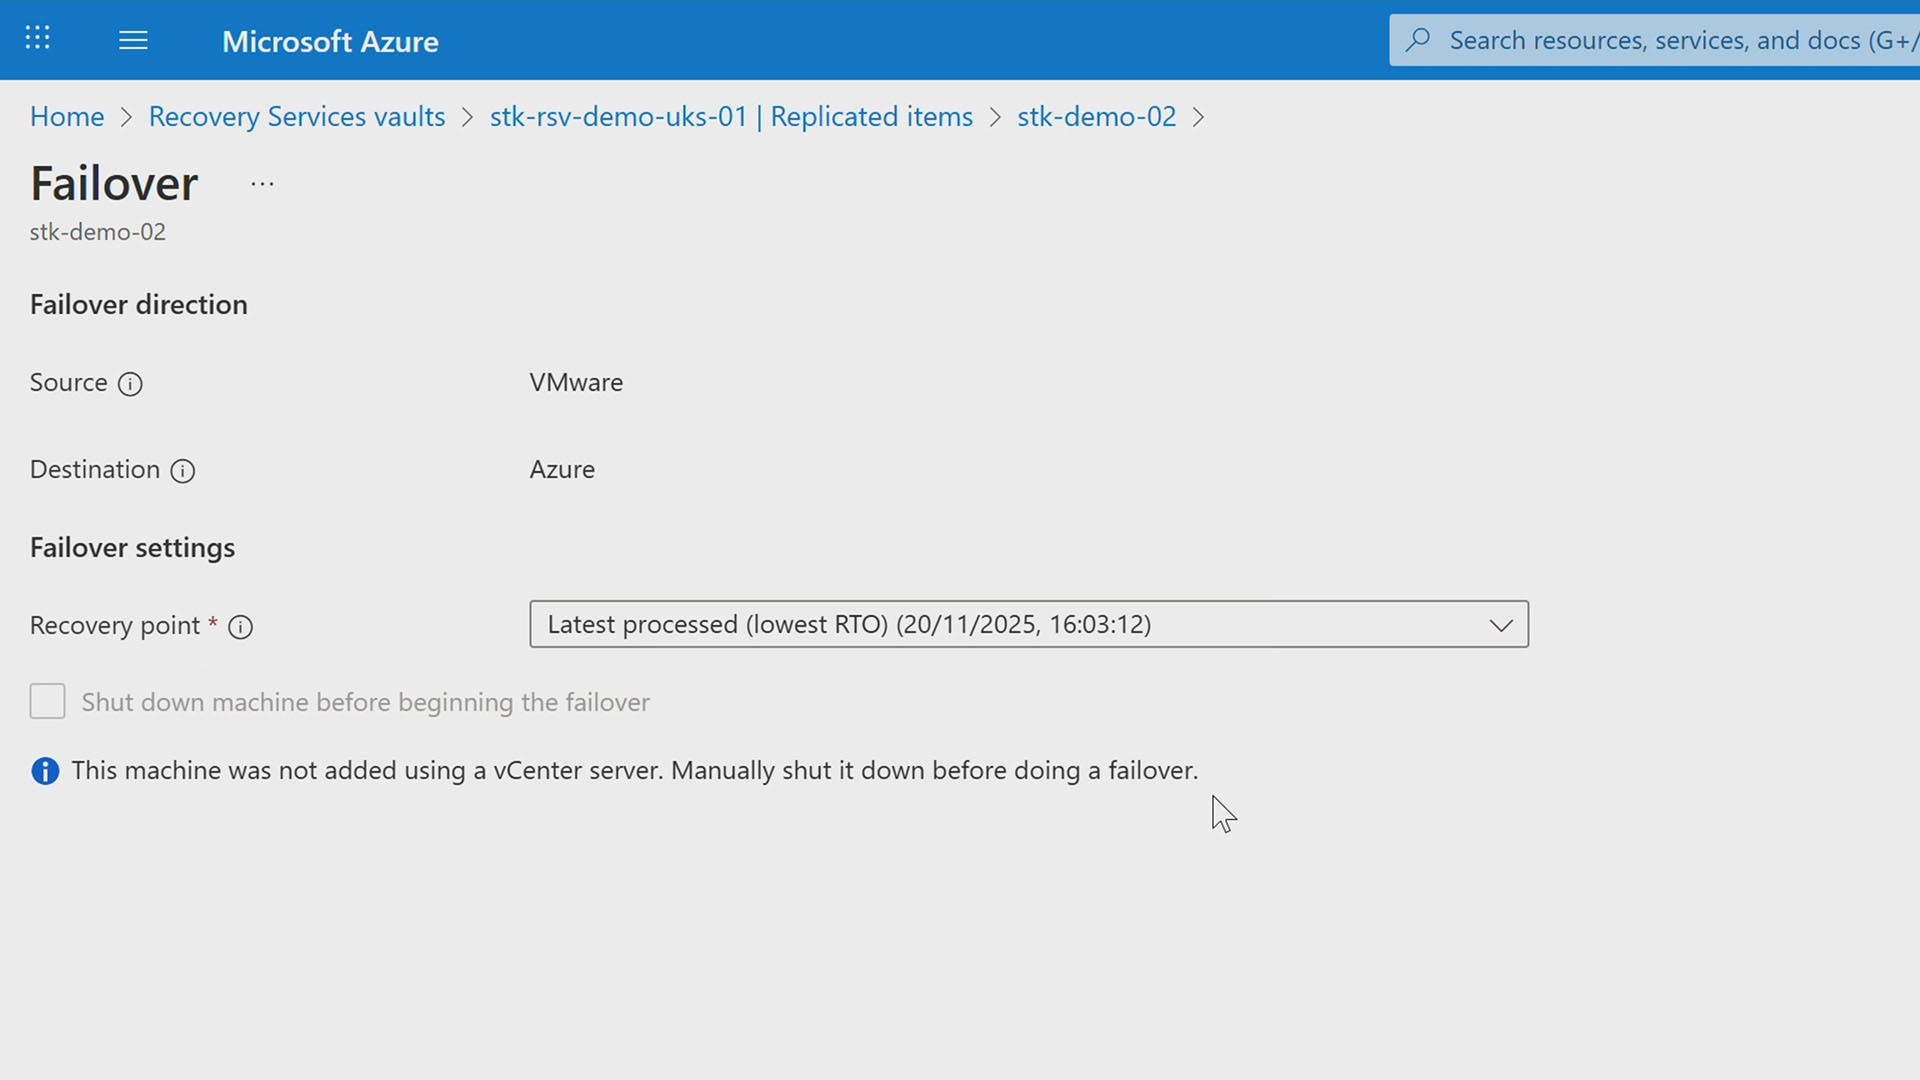
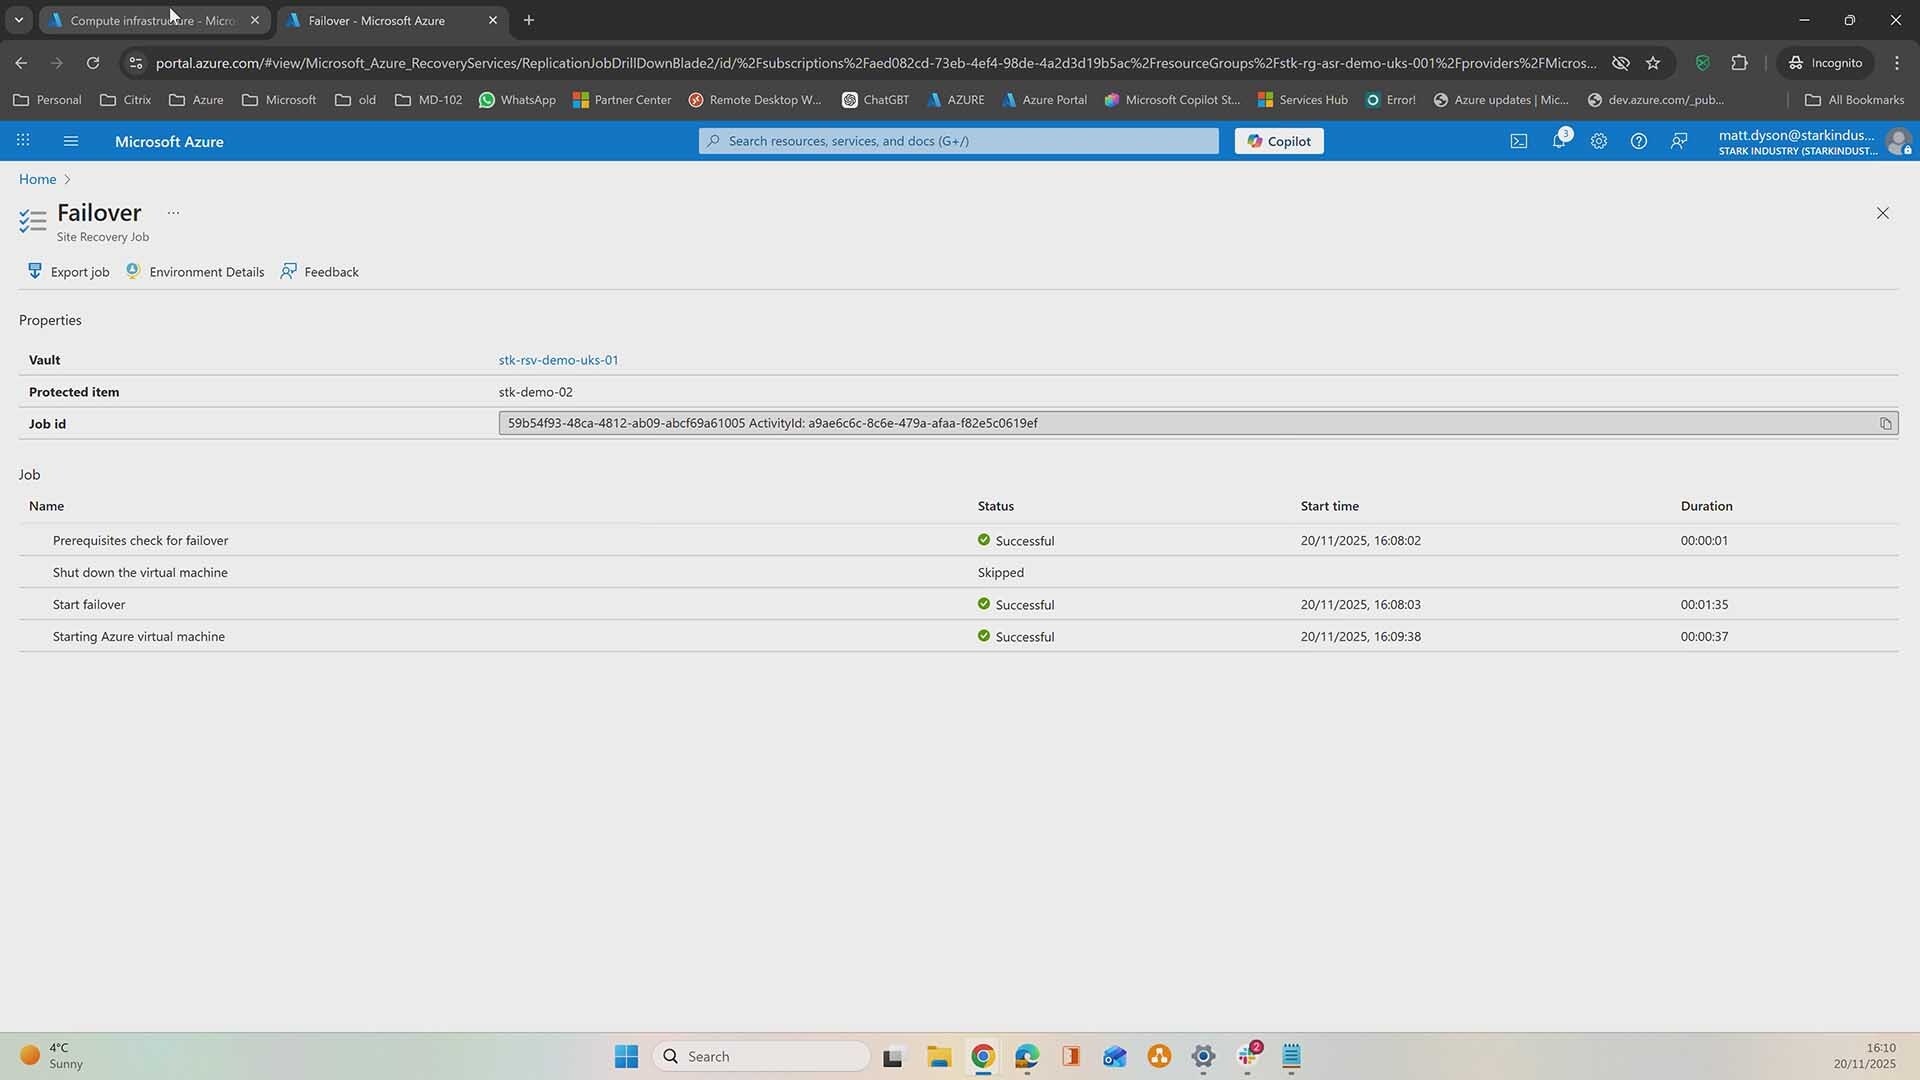
If you want to see a failover in action, check out the demo video below to see a Azure Site Recovery failover do its thing in real time. Prefer to take it step by step? Keep reading for a clear walkthrough you can follow at your own pace.

Step 1: Confirm replication health before anything else

Before triggering any kind of failover, the first thing to check is the health of your replicated VM.

In the Recovery Services vault, select your replicated item and confirm:

  • Replication status shows Healthy
  • Recovery points are being created regularly
  • No active warnings that would block failover

You may notice older warnings if the VM was previously powered off on-premises. That’s normal. As long as replication is now healthy and current, Azure Site Recovery is ready to step in.

At this stage, it’s also worth taking a look at the replication flow diagram. It shows:

  • The on-premises VM
  • Data passing through the replication appliance
  • Local cache storage
  • Replication into Azure as a managed disk

This visual confirmation is reassuring — it proves data is flowing exactly where it should be.

Step 2: Choose a test failover first (always)

A test failover is your safety net. It lets you prove recovery works without touching production workloads.

To start:

  1. Select the replicated VM
  2. Click Test Failover
  3. Choose a recovery point:
    • The latest recovery point is usually best
    • Or select an earlier point if you’re testing rollback scenarios
  4. Select the test virtual network
  5. Start the test failover


Using an isolated test network ensures:

  • No IP conflicts
  • No accidental user access
  • No impact on live services

Step 3: Watch Azure do the heavy lifting

Once started, Azure runs several background checks:

  • Confirms replication is fully up to date
  • Validates the mobility agent is healthy
  • Ensures the VM is in a failover-ready state

If everything passes, Azure begins creating the VM in the test network. In the demo, this took under two minutes, which is a strong indicator of how fast recovery can be when everything’s set up correctly.

You can follow progress in the Jobs blade to see exactly what’s happening at each stage.

Step 4: Identify the test VM in Azure

During a test failover, Azure creates a new VM:

  • The VM name includes “-test” at the end
  • It’s deployed into the test virtual network
  • CPU, memory, and disk configuration match the source VM

This naming convention makes it very clear what’s real and what’s temporary, which is helpful when you’re testing under pressure.

Step 5: Log in and validate functionality

Next, connect to the test VM using Azure Bastion.

You’re checking:

  • The VM boots successfully
  • You can log in without errors
  • The OS behaves as expected

Because this is a test failover:

  • Any changes you make won’t be saved
  • This environment is purely for validation
  • Nothing flows back to production

Once you’ve confirmed the VM is healthy, you can safely move on.

Step 6: Clean up the test failover properly

Testing is only useful if cleanup is just as smooth. Once you’re happy with the test VM, it’s time to remove all temporary resources.

  1. Return to the Recovery Services vault
  2. Open the test failover job
  3. Click Clean up test failover
  4. Confirm the failover is complete

Azure Site Recovery then automatically removes:

  • The test VM
  • Associated network interfaces
  • Any temporary resources created during the test

You’ll notice the VM disappears from the Virtual Machines list almost immediately. The job continues tidying things up in the background, but your environment is now clean and exactly as it was before the test.

This step is crucial: it ensures your test failover doesn’t leave unnecessary resources running, keeps costs down, and maintains a neat, ready-to-failover environment for the future.

Step 7: Trigger a real failover

With testing complete, it’s time for a real failover – used during an actual outage or a planned migration.

  1. Select the VM
  2. Click Failover
  3. Choose the latest recovery point
  4. Start the failover job

One important detail: If replication isn’t managed through vCenter, the on-premises VM must be manually powered off once failover completes. When vCenter is integrated, Azure handles this automatically.

This step prevents split-brain scenarios and ensures Azure becomes the single source of truth.

Step 8: Confirm the VM is live in production

Once the job completes:

  • The VM appears without the “-test” suffix
  • It’s connected to the production virtual network
  • The VM is now fully live in Azure

Connect again via Azure Bastion and confirm:

  • Login works
  • Applications and services start correctly
  • The VM behaves as expected in its new environment

At this stage, changes are persistent – this VM is now your production workload.

Step 9: Commit the failover

Once you’re confident everything is working:

  1. Commit the failover
  2. Complete the migration job

This tells Azure:

  • Replication is no longer required
  • The VM now lives permanently in Azure
  • Replication metadata can be cleaned up

After committing, the VM disappears from Replicated Items – because it’s no longer a replica. It’s live.

Step 10: Post-failover validation and planning

After failover, it’s worth spending time on:

  • Application testing
  • Service dependencies
  • IP address or DNS changes
  • Licensing or MAC-based dependencies

For more complex workloads – such as SQL Server or tightly integrated applications – planning ahead is critical. Azure Site Recovery makes failover fast, but successful recovery starts long before disaster strikes.

Preparation You Can Actually Trust

With your failover tested, validated, and cleaned up, you’re not leaving anything to chance. Azure Site Recovery takes panic out of the moment by replacing it with preparation. When things go wrong, the difference isn’t luck; it’s testing, planning, and knowing exactly how your environment behaves under pressure.

A working failover isn’t something you want to discover for the first time during an incident. It’s something you’ve already tested, timed, cleaned up, and trust.

If you want help designing Azure Site Recovery properly, testing it regularly, or making sure your failover plan actually holds up when it matters, Synextra’s here to get it right.

Subscribe to our newsletter

Stay ahead of the curve with the latest trends, tips, and insights in cloud computing

thank you for contacting us image
Thanks, we'll be in touch.
Go back
By sending this message you agree to our terms and conditions.